XMEN BLOGGER: 2016

Wednesday, December 28, 2016

Raspberry Pi - Install Node.js on Raspberry Pi 2 Model B


$ wget https://nodejs.org/dist/v7.3.0/node-v7.3.0-linux-armv7l.tar.gz
$ tar -xvf node-v4.0.0-linux-armv7l.tar.gz
$ cd node-v4.0.0-linux-armv7l

$ sudo cp -R * /usr/local/

$ node -v


FROM: http://thisdavej.com/beginners-guide-to-installing-node-js-on-a-raspberry-pi/

$ curl -sL https://deb.nodesource.com/setup_7.x | sudo -E bash -

$ sudo apt install nodejs

$ node -v
v7.3.0
$ node
> 1 + 3
4
> # We can hit Ctrl-C twice to exit the REPL and get back to the bash (shell) prompt.

Tuesday, December 27, 2016

Raspberry Pi - Node Telescope Server for Stellarium/SkySafary 4


From:
 https://www.npmjs.com/package/node-telescope-server
 https://github.com/fcsonline/node-telescope-server

 http://blog.raceconditions.net/wifi-telescope-control-with-skysafari-4/
 https://www.npmjs.com/package/stellar-socks


Overview
This is a small tutorial to connect Stellarium with a Celestron telescope, and control it remotly. The next diagram describes all the required elements to build your own homemade planetarium.

Requirements
 - RaspberryPi with raspbian installed.
 - A Ethernet wire or a Wireless adapter for your Raspberry Pi (I prefer a Wireless LAN adapter).
 - Telescope Celestron (Nexstar Protocol) with GoTo feature (Celestron NexStar 127SLT, in my case).
 - USB to Serial port adaptor (recommended).
 - A computer with Stellarium installed.

Installation
The first step is to install the nodejs and npm packages:

pi@raspberry $ sudo apt-get install nodejs npm

Verify that the current nodejs and npm packages have compatible versions:

pi@raspberry $ node -v
0.8.9

pi@raspberry $ npm -v
1.1.4

If the previous commands have returned older versions you should install node and npm manualy:

pi@raspberry $ wget http://www.nodejs.org/...
pi@raspberry $ tar zxf node-0.8.9.tar.gz
pi@raspberry $ cd node-0.8.9
pi@raspberry $ ./configure && make
pi@raspberry $ sudo make install

pi@raspberry $ node -v
0.8.9
pi@raspberry $ npm -v
1.1.4

Then install the node-telescope-server module in your Raspberry running:

pi@raspberry $ sudo npm install node-telescope-server -g

Now, connect your USB to Serial port adaptor to one of your available ports in the Raspberry Pi and connect the other side to the telescope. Run the next lsusb command to identify the USB device to be initialized:

pi@raspberry $ lsusb
...
Bus 001 Device 002: ID 4358:2523
...
pi@raspberry $ sudo modprobe usbserial vendor=0x4358 product=0x2523

Run dmesg command and you shall see lines like these:

pi@raspberry $ dmesg
usbserial_generic 1-1:1.0: generic converter detected
usb 1-1: generic converter now attached to ttyUSB0
usbcore: registered new interface driver usbserial_generic

Identify the device uid assigned by the kernel to the serial port, aka ttyUSB0

Start a nts instance to control your telescope. You should specify -t and -i arguments with your telescope type and file to the device file descriptor:

pi@raspberry $ nts -s stellarium -p 5050 -t nexstar -i /dev/ttyS0
Remote stellarium control server running at port 5000 to a nextar telescope
This command starts a Stellarium control server listenning at port 5050 connected to a Nexstar (Celestron telescopes) sending commands to /dev/ttyS0 device.

Now the Node Telescope Server (nts) is ready to receive instructions to move your telescope to the desired target.

Next step is to connect this nts instance with the Stellarium software. Open Stellarium and press Ctrl+0 or go to the telescopes window. Add a new telescope and choose the External software or remote computer. Then choose a desired name for your telescope, for example "NodeJS-RaspberryPI". Then specify the ip assigned to the RaspberryPI and the port listening by nts instance, in my case 192.168.5.1 and 5050 (because my Raspberry is configured as a AP gateway). Save the telescope configuration.

Multiple servers

$ nts -c config.json
Telescope Dummy: Remote dummy control server running at port 4000 to a dummy telescope
Telescope Stellarium Dummy: Remote stellarium control server running at port 4001 to a dummy telescope
Telescope Nexstar: Remote stellarium control server running at port 5000 to a nexstar telescope
Disabled remote web control server running at port 5001 to a nextar telescope

This command starts several servers defined in the config.json file.

An example of config file:

[
{
"name": "Telescope Dummy"
, "server": "dummy"
, "port": 4000
, "telescope-device": "/dev/null"
, "telescope-type": "dummy"
},
{
"name": "Telescope Stellarium Dummy"
, "server": "stellarium"
, "port": 4001
, "telescope-device": "/dev/random"
, "telescope-type": "dummy"

, "enabled": true
},
{
"name": "Telescope Nexstar"
, "server": "stellarium"
, "port": 5000
, "telescope-device": "/dev/ttyS0"
, "telescope-type": "nextar"
, "camera-device": "/dev/null"
},
{
"name": "Telescope Lx2000"
, "server": "web"
, "port": 5001
, "telescope-device": "/dev/ttyS0"
, "telescope-type": "lx2000"
, "camera-device": "/dev/null"

, "enabled": false
}
]

Last step is to click on connect button and the status label should change to "Connected".

Finally you have the Stellarium connected to your telescope! Choose the desired object and pres the Ctrl+1 and realize that the telescope start pointing to the target. :-)

Enjoy it!


-Do the same but now with Stellar-Socks (a TCP server for interacting with a telescope via serial connection from planetarium software such as Stellarium and SkySafari).

$ npm install stellar-socks

Configuration
By default the server will open a TCP socket on port 5000, and connect to a telescope on /dev/ttyUSB0. To configure these values, change the configuration in config.json.

Starting the Server

Before you start the server, you'll want to make sure you have your telescope on and aligned, as well as the Raspberry Pi (or other device) connected to the serial port on the telescope. You'll also want to make sure you have the configuration file config.json set up properly for your environment.
To start the server, navigate to the installation directory from the installation step, and run the following command:

$ npm start

When you run the command, the service will start up and announce its status as shown in the image below.

Running StellarSocks

You are now ready to configure your remote planetarium software to connect to the server.

http://www.nexstarsite.com/PCControl/RS232Cable.htm

Raspberry Pi - Reset user "pi" passwd


To reset your 'pi' password:

Power down and pull the SD card out from your Pi and put it into your computer.

Open the file 'cmdline.txt' and add 'init=/bin/sh' to the end. This will cause the machine to boot to single user mode.

Put the SD card back in the Pi and boot.

When the prompt comes up, type 'su' to log in as root (no password needed).

su

Type "passwd pi" and then follow the prompts to enter a new password.

passwd pi

Shut the machine down, then pull the card again and put the cmdline.txt file back the way it was by removing the 'init=/bin/sh' bit.

init=/bin/sh

Friday, December 23, 2016

Raspberry Pi - Blind (sunshades) control


WiringPi

Software

There ar three pieces of software (wiringPi (from Gordon Henderson), shell script, RaZ-OR function) to be installed, from which the last is optional for use by people that do have the RaZberry plugged in.

WiringPi module

The GPIO pins can be controlled directly from the command prompt. For security reasons that function does require access as root. That is not always convenient. Therefore the WiringPi module should be installed(following Plan B) on the Raspberry. It not only deals with the "root" problem, but it also makes interfacing easier.

$ gpio readall


For this example we use "soft" pin numbers 12,13,14 in the first column named wPi. Those correspond to the physical pin numbers 19,21,23 as you can see in the above table, which was made using the gpio readall command. Check this for your Pi board.

Raspberry Pi pins:

PIN 01 - 3v3 battery (+)
PIN 19 (GPIO12) - down button (+)
PIN 21 (GPIO13) - stop button (+)
PIN 23 (GPIO14) - up button (+)
PIN 25 - ground (-)

Shell script

If you run OpenRemote on the Raspberry Pi, the sunshades can be controlled via the OpenRemote Shell execution protocol with the following script:

#!/bin/sh
PIN=$1
/usr/local/bin/gpio mode $PIN out
/usr/local/bin/gpio write $PIN 1
sleep 0.1
/usr/local/bin/gpio write $PIN 0

If you run on RaspCLI:

/usr/local/bin/gpio mode 19 out
/usr/local/bin/gpio write 19 1

Result is:


If you do not run OpenRemote on the Raspberry, you can control the shades using this script via the RaZ-OR module (see below)

For the further description it is assumed the file is called GPIO.sh. It is called with a single numerical parameter that is interpreted as follows if you use the above wiring diagram and the wiringPi module:

down  : 12
stop  : 13
up    : 14

Then:
/usr/local/bin/gpio mode 14 out
/usr/local/bin/gpio write 14 1
-> Goes up

And:
/usr/local/bin/gpio mode 13 out
/usr/local/bin/gpio write 13 1
-> Goes stop

The script makes the GPIO temporarily go high, which makes the Somfy remote button close for a short while.
In this script the wiringPi PIN numbers are used. See more detail on those pin assignments here.


REFERENCE

Somfy control
http://www.openremote.org/display/docs/OpenRemote+2.0+How+To+-+Control+Sunshades+-+Somfy+with+Raspberry+Pi

blind-control
http://romor.github.io/blind-control/

Raspberry Pi - WiringPi with RF 433mHz transmitter


WiringPi GPIO pins


Pin 2 - Vcc (5V)
Pin 6 - GND
Pin 11 - GPIO 17 - (WiringPi Pin 0): Linked to Emitter
Pin 13 - GPIO 27 - (WiringPi Pin 2): Linked to Receiver (RF433MHz – XY-MK-5V)


FROM: http://i-build-stuff.blogspot.com.es/2015/01/wireless-room-temperature-monitoring_27.html

With that simple setup on i can go ahead i can try and send data and see if it is being received.

Now on my computer i connect to my Raspberry Pi using ssh

Code 1 : ssh pi@yourlocalIPaddress
(once prompted, enter your password. Default is "raspberry")

Then I have to go to the specific folder where the 433Utils programs are stored in order to start them.

Code 2 : cd 433Utils/RPi_utils

This bring you to the correct folder where the sending program and the sniffing program are stored.
Now i open another Terminal window and login via ssh (code 1) and i go to the 433Utils folder (code 2)

In the first terminal window start the Sniffer program.

Code 3 : sudo ./RFSniffer

Now in the second terminal window send a code

Code 4 : sudo ./codesend 121234 (any random integer)

If everything works fine, you should see your integer going through the Sniffer result window just like in the below screenshot :

pi@raspberrypi ~/wiringPi $ gpio readall


(*) Raspberry Pi RF remote (433MHz)

FROM: http://npham.dk/?p=34

Creating RF transmitter / receiver

Source: http://shop.ninjablocks.com/blogs/how-to/7506204-adding-433-to-your-raspberry-pi

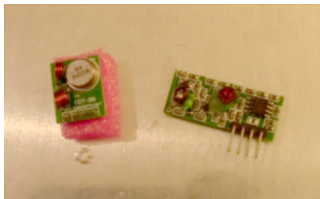
I bought my RF transmitter and receiver from eBay a about 1$.
Connecting RF transmitter and receiver to the Raspberry Pi is pretty simple.
Both the reciver and transmitter has a VCC, GND and DATA pins.
And all you do is connect it to the Raspberry Pi GPIO pins.


Install RPi_utils

Source:
https://github.com/ninjablocks/433Utils/tree/master/RPi_utils

Start by installing RPI_utils

sudo apt-get update

#Installs GIT
sudo apt-get install git
sudo apt-get install git-core

#Installs 433utils
git clone git://github.com/ninjablocks/433Utils.git
cd 433Utils/RPi_utils/

#Installs wiringPI
git clone git://git.drogon.net/wiringPi
cd wiringPi
git pull origin
./build

#Builds RPI_util
cd ..
make all

Testing and decoding RF signal

To capture and decode the RF signal from the remote, I ran the program RFSniffer.

sudo ./RFSniffer

When I push the A (on) button on the remote, I get the following code on the screen.

Received 5260625
Received 5260625
Received 5260625
Received 5260625
Received 5260625

To test if the transmitter works you can send the received value with this command.

sudo ./codesend 5260625

If you convert 5260625 to binary, you get 10100000100010101010001.
And looking at the binary value of all the buttons, you start to see a pattern.

Button Decimal value Binary value
A (On) 5260625 10100000100010101010001
A (Off) 5260628 10100000100010101010100
B (On) 5263697 10100000101000101010001
B (Off) 5263700 10100000101000101010100
C (On) 5264465 10100000101010001010001
C (Off) 5264468 10100000101010001010100
D (On) 5264657 10100000101010100010001
D (Off) 5264660 10100000101010100010100

They all starts with 1010000010, and all the ON buttons ends with 0001 and all the OFF buttons ends with 0100.
The 1010000010 matches with the dip-switches; 10 = down and 01 = up.
The middle part, is a value that identifies A,B,C and D.
You can see the pattern here:

Dip switch Button Id On / Off
A = 10 10 00 00 10 + 00 10 10 10 1 + 0001 / 0100
B = 10 10 00 00 10 + 10 00 10 10 1 + 0001 / 0100
C = 10 10 00 00 10 + 10 10 00 10 1 + 0001 / 0100
D = 10 10 00 00 10 + 10 10 10 00 1 + 0001 / 0100

Script

I then created the following bash script.

#!/bin/bash
BTN=$1
STATUS=$2

BTN=$(echo $BTN | tr '[:lower:]' '[:upper:]')
STATUS=$(echo $STATUS | tr '[:lower:]' '[:upper:]')

DIP_SWITCH="DDUUD" #Change dip switches to match the remote

#hardcoded values
BTN_A="001010101"
BTN_B="100010101"
BTN_C="101000101"
BTN_D="101010001"

DIP_SWITCH=$(echo $DIP_SWITCH | sed 's/D/10/g' | sed 's/U/00/g')

case $BTN in
A )
BTN=$BTN_A ;;
B )
BTN=$BTN_B ;;
C )
BTN=$BTN_C ;;
D )
BTN=$BTN_D ;;
* )
echo "Please define the button [A-D]";exit;
esac
case $STATUS in
ON )
STATUS="0001" ;;
OFF )
STATUS="0100" ;;
* )
echo "Please define the button state [ON/OFF]";exit;
esac

BIN=$(echo $DIP_SWITCH$BTN$STATUS)
DEC=$((2#$BIN))

#echo $DEC
sudo /home/pi/codesend $DEC

And to emulate a click, I just call

./RFISend.sh A ON

Control via web

Because the codesend uses wiringpi, it is required to call with sudo.
But if you need to call it from a webserver, it creates some problem, because sudo requires a password.

So we need to edit visudo, so it doesn’t require a password.
(it may not be a secure thing to do, but in my case the webserver is not exposed to the internet, and is only for “at home” use)

sudo visudo

Add the following line to the file.
#NOTE: use TAB and not space, except for the last one – after NOPASSWD:

www-data ALL=(root) NOPASSWD: /home/pi/433Utils/RPi_utils/codesend

Save the file and reboot the Raspberry Pi, and you’re good to go.

Now the local PHP webserver can call the script with:

< ? php
shell_exec("/home/pi/433Utils/RPi_utils/RFISend.sh A ON");
? >


http://rsppi.blogspot.com.es/2013/08/comunicacion-por-rf-433mhz-desde.html


Home Control Dashboard
https://dendriticspine.github.io/projects/2014/10/10/homedashboard


REFERENCE:

http://www.touteladomotique.com/forum/viewtopic.php?f=118&t=15760

http://wiringpi.com/wp-content/uploads/2013/03/pins.pdf

WiringPi GPIO pins
http://www.14core.com/configure-clibrary-wiringpi/


http://blogwifi.fr/raspberry-pi-b-telecommande-433-mhz-universelle/

http://domotique-home.fr/domotique-diy-partie-2-protocole-433-mhz/

http://npham.dk/?p=34
http://www.princetronics.com/how-to-read-433-mhz-codes-w-raspberry-pi-433-mhz-receiver/

Thursday, December 22, 2016

English


Is it English your mother tongue?
Yes, It's my mother tongue

ad (advertisement)
glass
creepy (terrorifico)
scary (to scare)
Prank (joke) - clown prank

from out of nowhere

Do you want to go with us?
Yes i'd love too

What shall we do?

Thinks get better

I wasn't the only one

let me help you

I'm glad you won
I'm sorry you lost

Ask to wolk more slowly
I'm affread it's going to rain

take a deep breath
to breathe - respirar
breath - respiracion

littering (litter) - grosery
Ped Xing (x-ing)

cobbler (zapatero)
stein (tanque de cerveza)

I wish you well

With a better level of English... you be able to...

rail way - rail road

I'm thrilled to be back from holidays
I'm happy to be back
I'm recommend you...

Wednesday, December 21, 2016

Raspberry Pi - IP fija


Tuesday, December 20, 2016

Raspberry - Adding 433 to your Raspberry Pi


From: https://web.archive.org/web/20150415084145/http://shop.ninjablocks.com/blogs/how-to/7506204-adding-433-to-your-raspberry-pi
Thanks to: Justin Clayden


In this blog post I'll show you how to add RF 433MHz to your Raspberry Pi.

Requirements

- A Raspberry Pi (ORLY?) I'm using the revision 2 Pi, but if you have the revision 1 board, you'll just need to be mindful of the different pin numbers. As you'll see, the code uses *wiringPi* numbers and these haven't changed between revisions (thankfully!) but be aware that the RF receive pin we use will be BCM GPIO pin 27 in revision 2, and 21 in revision 1. That little tidbit is just for the curious; as I say the wiringPi pin numbering system abstracts this for us nicely.

- A 433MHz Transmitter module

- A 433MHz Receiver module

- The code! https://github.com/ninjablocks/433Utils

Phase One - Install the Hardware


Step One - Install the Transmitter module

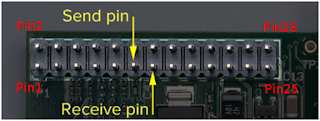
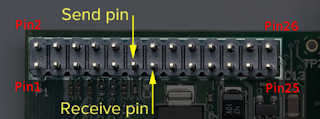
The requirements for this module are easily satisfied. Provide it with power and a data signal, and optionally an aerial, and it's well happy. We'll connect the DATA pin of this module to wiringPi pin 0. (This is GPIO pin 0 and BCM GPIO pin 17).

That's the 6th pin from the left on the lower row:


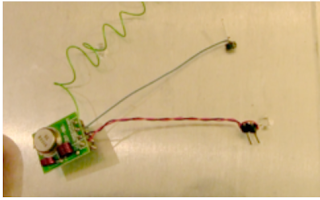
I used wire-wrapping techniques to connect mine:


Step Two - Install the Receiver Module

The requirements for this module are the same as for the transmitter, however there are some pin differences, so don't be caught out by this. The two middlemost pins are both data pins, and there is an entirely different area on the board to which to attach an aerial. Your receiver board may look different to mine. In fact my receiver has 8 pins.

The main message is to check your pin out documentation for your devices!

Attach the DATA pin of your receiver to wiringPi pin 2 - that's GPIO2; the 7th pin from the left on the lower row:


Phase Two - Run the Software

Step One - Clone/Download the '433Utils' github repo if you haven't already.

You'll find a 'RPi_utils' directory; that's where the code for this How-To resides.

Step Two - Build the Software

cd into the 433Utils/RPi_utils directory and do a:

make all

Run the codesend Sketch

On your Ninja Dashboard, choose the 'Listen' function. Then do a:

sudo ./codesend 12345

Almost any number will do here. You should see its hexidecimal equivalent appear in the Listen window. Change the number and verify that a different number appears in the Listen window.

Step Three - Run the RFSniffer Sketch

Within the 433Utils/RPi_utils directory, do a:

sudo ./RFSniffer

Grab your wireless button (or any 433MHz generating device.) and get pressing!

You should see its code appear in your terminal:

Starting Up..

Received 89745

Received 89745

Received 89745

Received 89745

Received 89745

NOTE: Your code may differ, of course.

Improvements

One limitation of this code is that it requires sudo to work, due to its calling of certain wiringPi functions.

Raspberry Pi - Remote Shade Control


Somfy Telis Interface


green - GND
GPIO19,21,23 - +Vcc
GPIO25 - GND

Opto coupler CNY74-4H used in the add-on electronics to connect push buttons (remote control).

http://www.vishay.com/docs/83526/83526.pdf


Shades Automation
http://www.seebq.com/2013/11/29/shades-automation.html

http://www.openremote.org/display/docs/OpenRemote+2.0+How+To+-+Control+Somfy+Sunshades+with+Raspberry+Pi
http://www.openremote.org/display/docs/OpenRemote+2.0+How+To+-+Control+Sunshades+-+Somfy+with+Raspberry+Pi

http://www.smbaker.com/automated-cellular-shades-with-somfy

GitHub
https://github.com/seebq/remote_shade_control_app

http://romor.github.io/blind-control/


Domoticz
http://www.domoticz.com/forum/index.php
http://www.nemcon.nl/blog2/wiring


Lamp Remote Control (with Python) - 2N222A Transistor
http://jack.minardi.org/raspberry_pi/make-an-internet-controlled-lamp-with-a-raspberry-pi-and-flask/


Example with 2N25 transistor (optocoupler):
http://electronics.stackexchange.com/questions/76682/shorting-a-remote-control-pushbutton-with-gpio-and-a-transistor


R=100 Ohms


[solved] How to start Check Point High Availability (CPHA) Module?


From: https://firewallengineer.wordpress.com/2012/05/02/solved-how-to-start-check-point-high-availability-cpha-module/

cphaprob stat
will display the status of the cluster

[Expert@R65-FW-254]# cphaprob state
HA module not started.
[Expert@R65-FW-254]#

cphaprob -a if
Will display the monitoring interfaces, the fwd, cphd dameon states, look for any interface down alerts if the cluster is down.

[R65-FW-254]# cphaprob -a if
HA module not started.

cphaprob list
Will display the overall health status of the cluster / Shows a status in list form

[R65-FW-254]# cphaprob list

Built-in Devices:

Device Name: Interface Active Check

Registered Devices:

Device Name: Synchronization
Registration number: 0
Timeout: none

Device Name: Filter
Registration number: 1
Timeout: none

Device Name: fwd
Registration number: 2
Timeout: 2 sec

[R65-FW-254]#

cpstat ha
high availability state

[Expert@R65-FW-254]# cpstat ha
Product name: High Availability
Version: N/A
Status: problem
HA installed: 1
Working mode:
HA started: no
[Expert@R65-FW-254]#

[Expert@R65-FW-254]# cpstat -f all ha
Product name: High Availability
Major version: 6
Minor version: 0
Service pack: 1
Version string: N/A
Status code: 2
Status short: problem
Status long:
HA installed: 1
Working mode:
HA protocol version: 2
HA started: no
HA state: ClusterXL inactive or machine is down
HA identifier: 0

Interface table
————————————————
|Name|IP|Status|Verified|Trusted|Shared|Netmask|
————————————————

Problem Notification table
————————————————-
|Name |Status |Priority|Verified|Descr|
————————————————-
|Synchronization|problem| 0| 730| |
|Filter |OK | 0| 730| |
|fwd |OK | 0| 731| |
————————————————-

Cluster IPs table
———————————————–
|Name|IP|Netmask|Member Network|Member Netmask|
———————————————–

Sync table
—————–
|Name|IP|Netmask|
—————–
[Expert@R65-FW-254]#

[Expert@R65-FW-254]# fw hastat
HOST NUMBER HIGH AVAILABILITY STATE MACHINE STATUS
localhost ?? module disabled
[Expert@R65-FW-254]#

[R65-FW-254]# cpstart
SVN Foundation: cpWatchDog already running
SVN Foundation: cpd already running
SVN Foundation started
FireWall-1: starting external VPN module — OK
Note: This machine is not defined as a part of any Cluster.
It is possible that the IP of this machine as it appears in your hosts
file differs from the general IP of this machine in the Management server.
Alternatively, Check your Cluster configuration in the Management server.
If this machine is no longer part of a Cluster, please disable Check Point ClusterXL
or State Synchronization on it.
FireWall-1: Starting fwd

Installing Security Policy InitialPolicy on all.all@R65-FW-254
Fetching Security Policy from localhost succeeded
Failed to read database.
Probably module was never installed
Failed to fetch policy from masters in masters file
FireWall-1: enabling bridge forwarding
FireWall-1 started
FloodGate-1 is disabled. If you wish to start the service, please run ‘etmstart enable’.
SmartView Monitor: Not active
cpstart: Power-Up self tests passed successfully
cpstart: Starting product – SVN Foundation
cpstart: Starting product – VPN-1
cpstart: Starting product – FloodGate-1
cpstart: Starting product – SmartView Monitor
cpstart: Starting product – Advanced Routing
[R65-FW-254]#

[Expert@R65-FW-254]# cpconfig
This program will let you re-configure
your Check Point products configuration.

Configuration Options:
———————-
(1) Licenses
(2) SNMP Extension
(3) PKCS#11 Token
(4) Random Pool
(5) Secure Internal Communication
(6) Disable Advanced Routing
(7) Disable cluster membership for this gateway
(8) Automatic start of Check Point Products

(9) Exit
Enter your choice (1-9) 7

REFERENCE
https://www.cpug.org/forums/installing-upgrading/9786-how-do-i-start-my-ha-module.html

https://supportcenter.checkpoint.com/supportcenter/portal?eventSubmit_doGoviewsolutiondetails=&solutionid=sk36247

SOLUTION [May 20, 2012]
You can read the solution here🙂
https://firewallengineer.wordpress.com/2012/05/20/solved-finally-cpha-configuration-resolved/

Checkpoint R65 - Add routes


# route add -host x.x.x.x gw x.x.x.x
# route add -net x.x.x.x/24 gw x.x.x.x

# route add -host x.x.x.x gw x.x.x.x
# route add -net x.x.x.x/24 gw x.x.x.x

# route --save
# route -n

# netstat -nvr
# clish
> set static-route x.x.x.x/24 next hop gateway address x.x.x.x on

Cisco - Mirror


# sh monitor
# conf term
# monitor session 1 source int fast 1/0/2
# monitor session 1 destination int fast 1/0/5

# no monitor session 1

Monday, December 19, 2016

Cisco - How to Erase configuration


For safety, lets start by wiping the routers current config. Enter these commands:

enable
erase nvram:
Erasing the nvram filesystem will remove all configuration files! Continue? [confirm]

Press "y" to erase the routers config. Then enter the below commands. Note that the router may not ask you to save the current config. If it does, make sure you say no - we are trying to wipe the config.

reload
System configuration has been modified. Save? [yes/no]: no
Proceed with reload? [confirm]

Press "y" to let the router reboot. For those people who have some familiarity with Cisco routers the "erase nvram:" command has supersede the "write erase" and "erase startup-config" commands (these commands all do the same thing).

When the router has completed booting this time it will ask if you want to run the setup wizard, say "no". It should eventually tell you to press "return to get started". Tap return a few times. Now we need to go into config mode:

enable
config terminal

Now copy the config you want to load onto the router into the clipboard (hint: CTRL-A then CTRL-C), and paste into HyperTerminal (Edit/Paste To Host). Once it has pasted in, you need to save the config.

CTRL-Z
copy running-config startup-config

With any luck, your now done!


config t
int fa0/1
ip address 192.168.1.1 255.255.255.0
description *** Assigning an ip address to a physical fast ethernet port on the switch***

int vlan 1
ip address 192.168.2.1 255.255.255.0
description *** Assigning an ip address to the virtual (vlan) interface on the switch ***

How to install a config text file into a Cisco router


From: https://supportforums.cisco.com/document/13116/how-install-text-file-configuration-router

If the configuration is already uploaded, go directly to step 8.

1. If the configuration needs to be copied from another router, connect to that router through the console or Telnet. At the Router > prompt, issue the enable command and provide the required password. The prompt changes to Router#, indicating that the router is now in privileged mode.
2. To force the router to return the entire response at once, rather than a screen at a time, issue the terminal length 0 command. This allows you to capture the configuration without extraneous --more-- prompts generated when the router responds a screen at a time.
3. On the HyperTerminal menu, select Transfer > Capture Text. The Capture Text window appears.
4. Name this file config.txt.
5. To dismiss the Capture Text window and begin the capture, click Start.
6. Issue the show running-config command and allow time for the router to complete its response.
7. To end the screen capture, select Transfer > Capture Text > Stop on the HyperTerminal menu.
8. Open the config.txt file you created in any text editor, such as Notepad or Wordpad.
9. Search for and remove any line that starts with AAA.
Note: This step removes any security commands that could lock you out of the router.
10.For each interface that is followed by shutdown, leave it as it is.
11. For all other interfaces, issue the no shutdown command, as shown in this example:

interface Serial0/0
no ip address
no ip directed-broadcast
no shutdown

12. Save the file.
13. Connect to the router that needs the configuration.
14. Open the config.txt file.
15. Highlight the entire contents of the config.txt file.
To accomplish this, drag the cursor from before the first character to after the last character in the file while holding down the left mouse button. If you are using Notepad, select Edit > Select All from the menu.
16. Copy the selected text to the Windows clipboard.
To copy, you can either select Edit > Copy from the text editor's menu, or hold down the CTRL key and simultaneously press the C key.
17. Switch to the HyperTerminal window and issue the configure terminal command at the Router# prompt and select Enter.
18. Paste the configuration file into the router by selecting Edit > Paste to Host on the HyperTerminal menu.
19. After the configuration has finished pasting, and the router brings you back to the configuration prompt, issue the copy running-config startup-config command. This writes the configuration into memory.
20. To return to the Router# prompt, issue the exit command.

Sunday, December 11, 2016

London Visit Guide


From: https://travellingtheworld2016.wordpress.com/2016/02/16/london/
Thanks to: Travelling the World


Essential visits

Wesminster Palace: It is a Victorian Gothic building, that houses the chambers of the British Parliament.

Tower of London: it houses the Crown Jewels.

Westminster Abbey: is the oldest and most famous London temple. Built over several centuries it has hosted famous events.

Buckingham Palace: It is the official residence of the British Royal family.

Big Ben: Has become a symbol of London, it’s very beautiful.

Tower Bridge: is the most famous bridge in London because of its history.

London Eye: Built in 2000, to celebrate the new millennium. It is an observation wheel situated 135 metres above the western end of the Jubilee Gardens.

The Shard: is the tallest skyscraper in the European Union with a height of 310 meters.

Chinatown: is London’s chinatown, the first businesses emerged in the middle of the last century.

Covent Garden: is one of the most charming districts in London.

Trafalgar Square: is one of the largest squares in the world. It is in central London, built to commemorate the Battle of Trafalgar.

Madame Tussauds: It is the most famous wax museum in the world. It has the largest collection of celebrity figures. Madame Tussauds has many locations, the biggest is in London.


Samsung AQV12FAN reset codes


Q:
I have a samsung aqv12fan unit not working just the 3 lights 2x green 1x red constantly flashing.

A:
Try a reset of the unit.

Remove one battery, hold down the temp setting up AND down buttons while refitting the battery.
You should get a screen which says:

10
00
00

Enter the six digits:

09 48 77

You enter the codes by pressing certain buttons for each digit/line.
Then press 'mode' button.
It's not that hard to work out which button effects what digit.
Try it, and work it out, you can't go wrong if you just make sure the right digit sequence shows up when you press the mode button.
You will be greeted with another screen saying:

10
00
00

Enter the next six digits:

17 52 45

Press 'mode' and the 'on/off' buttons.

This should fix your issue.

if no response you have a dead unit/receiver PCB/remote transmitter.

Monday, December 05, 2016

Crema de Calabaza con Calabacines y Puerros - Monsieur Cuisine Plus


Ingredientes (para 4 personas):

350gr de calabaza
200gr de calabacines (aprox. 2 puerros)
150gr de puerros (aprox. 3 puerros)
1 dientes de ajo
1 cebolla
3 quesitos light
45ml de aceite
450ml de agua
sal (al gusto)
pimienta (al gusto)

Preparación:

1. Limpiamos/lavamos el puerro, lo cortamos en trozos y lo introducimos en el vaso.
2. Pelamos y limpiamos/lavamos la cebolla y la introducimos en el vaso.
3. Programamos 8 segundos a velocidad 5 (con la tapa y el cubilete puestos).
4. Bajamos los ingredientes al fondo del vaso con ayuda de la espátula.
5. Vertimos el aceite en el vaso.
6. Y sin el cubilete puesto, programamos 8 minutos a velocidad 2 y temperatura 100ºC.
6. Pelamos y lavamos la calabaza y los calabacines y lo introducimos todo en el vaso.
7. Ahora con el cubilete puesto, trituramos durante 10 segundos a velocidad 5.
8. Vertimos el agua hasta cubrir los alimentos y echamos la sal.
9. Bajamos los ingredientes al fondo del vaso y lo cerramos con la tapa y el cubilete.
10. Programamos 30 minutos a velocidad 1 y temperatura 100ºC.
11. Echamos los 3 quesitos.
12. Trituramos durante 1 minuto a velocidad 7 (con la tapa y el cubilete puestos).

Y ya esta lista para servir.

La receta la he puesto sin patata, si queréis, podéis echarle una patata troceada a dados justo cuando se introduce en el vaso de la Monsieur Cuisine la calabaza y el calabacín cortados a trozos. Se pueden sustituir los quesitos por queso de cabra (100gr) e incluso si se quiere que sea más cremosa, echarle nata liquida para cocinar (light o normal).

Monday, November 28, 2016

HP Switches - Comware 5 commands


Comandos Comware5 más importantes:


# Ver la configuración global o de un puerto:

display current-configuration
display current-configuration int gi1/0/5

# Ver la mac de un puerto (siempre que no esté asociada a un puerto con port-security configurado)

[HPS5120]display mac-address int gi1/0/1
MAC ADDR VLAN ID STATE PORT INDEX AGING TIME(s)
001e-4f3b-09f5 2 Learned GigabitEthernet1/0/1 AGING

# Ver la mac de un puerto configurado como port-security (es normal que aprenda 3 macs):

[HPS5120]display mac-address int gi1/0/1
[HPS5120]display port-security mac-address security
MAC ADDR VLAN ID STATE PORT INDEX AGING TIME(s)
00xx-2xxa-xx96 5 Security GigabitEthernet1/0/37 NOAGED
00xx-2xxa-aaxx 5 Security GigabitEthernet1/0/30 NOAGED
00xx-2xxa-adxx 5 Security GigabitEthernet1/0/13 NOAGED
00xx-2xxa-xxb2 5 Security GigabitEthernet1/0/15 NOAGED
00xx-2xxa-adxx 5 Security GigabitEthernet1/0/4 NOAGED

[HPS5120]display port-security mac-address security | include 1/0/37
00xx-2xxa-xx96 5 Security GigabitEthernet1/0/37 NOAGED
f0xx-fxx6-xx7d 5 Security GigabitEthernet1/0/37 NOAGED
00xx-2fxx-axx6 98 Security GigabitEthernet1/0/37 NOAGED

# Ver tabla de ARP en los CORES:

[HPC5500]display arp
Type: S-Static D-Dynamic O-Openflow
IP Address MAC Address VLAN ID Interface Aging Type
10.1.1.69 7xx8-xx55-9xx6 10 BAGG2 10 D
10.1.1.70 0008-xx1a-axx2 98 BAGG2 13 D

# Para volver a habilitar un Puerto que se haya deshabilitado por el port-security

[HPS5120]int gi1/0/37
[HPS5120-GigabitEthernet1/0/37]shutdown
[HPS5120-GigabitEthernet1/0/37]undo shutdown

# Deshabilitar el port-security (conf general)

undo port-security enable

# Para ver los logs

display logbuffer

# Port Security

- Configuración global:

port-security enable
port-security trap intrusion
port-security timer autolearn aging 1 -> Tarda 1 min en liberar la mac cuando no se utiliza, por ejemplo cuando desconectas el pc del teléfono

- Configuración interface:

port-security max-mac-count 3
port-security port-mode autolearn
port-security intrusion-mode disableport-temporarily -> Lo pone en down durante 20 seg y luego lo levanta
port-security mac-address dynamic -> no aparecen las macs en la configuración del puerto y tarda menos en liberarlas que con el sticky cuando se desconecta el puerto
port-security mac-address aging-type inactivity

# show cdp neighbours - LACP:

[HPS5130]display lldp neighbor list

Wednesday, November 23, 2016

iCade + Raspberry Pi + RetroPie + 10" Screen

From: Foro ZonaArcade
(Thanks Aleks81 for sharing)


Hola gente!
Hacía un montón que no me pasaba por el foro, ahora he empezado otro proyecto algo mas portatil y menos laborioso que el que hice la ultima vez (http://zonaarcade.forumcommunity.net/?t=50237300) que para colmo no funciona después de un año sin usar...cosas que pasan por poner piezas de desguace dentro jeje.
Esta vez me abrió los ojos esta mini guia (http://imgur.com/a/wb6fm?gallery) de alguien que había comprado un iCade que están tirados de precio ya (sobre 35€) y le instalo una pantalla y una Raspberry Pi.
Yo ya tengo medio montado el trasto pero aun me faltan muchos detalles que pulir y alguna pieza de madera que hacerle. Sin duda una manera bastante económica de hacerte una bartop sin demasiado jaleo.
Cuando termine le diseñare los vinilos para customizarla.


Hola!
Te cuento, es muy sencillo todo. Primero, la pantalla cabe en horizontal, de hecho si ves la foto yo la monté en horizontal porque aparte de pasman y juegos tipo 1941 no hay demasiados juegos verticales.
Los controles es super fácil, compré este USB encoder por eBay (13,50€) y simplemente es quitar los cables de los botones originales y poner los cables que te mandan con el encoder, solo quitar y poner, igual con la palanca.
En cuanto a la calidad de botones y joystick me parece bastante buena calidad, hay gente que le gusta que sean muchísimo mas suaves y se los cambian pero para mi sinceramente para mi van bien. Lo único es que le puse un botón adicional (1,80€)en el lateral y lo configuré como ESC. Fíjate que leí en un post uno que le había cambiado el joystick por uno mejor y por no probarlo antes compré uno nuevo con la base octogonal en vez de cuadrada para más movilidad, pues después de probarlo simplemente he cambiado la baste por la octogonal porque para mi no compensa toda la faena que es cambiar la palanca, dudo que vaya a notarse apenas...
La caja es robusta y de muy buena calidad.


NOTA: La iCade se abre con un destornillador TORX T8H.


- Donde comprar el controlador de pantalla HDMI (LCD Controller Board Driver KIT):

 CSMQSHOP (eBay Store)

 HDMI AV VGA USB Diy LCD Controller Driver Board Kit for LCD LED Screen Panel


- Donde comprar el apadtador USB del Pad

Zero Delay Arcade USB Encoder PC to joystick for MAME I-Pac Ipac style


Setup OpenSSH (Cygwin) for public key authentication

From: dbaportal.eu
(Thanks to alesk for his great job)


It took me awhile to realize that my SSHD installation on my Windows 2012R2 was not ready yet to accept public key authentication, which is a key feature.
If we want to automate some tasks we need passwordless authentication to our Windows 2012 R2 server.

By default sshd is running under Local System account and this is in conflict with implementation of public key authentication of OpenSSH in Cygwin. If you recollect from my last post, special account was created, called cyg_server:

 *** Info: On Windows Server 2003, Windows Vista, and above, the
 *** Info: SYSTEM account cannot setuid to other users -- a capability
 *** Info: sshd requires. You need to have or to create a privileged
 *** Info: account. This script will help you do so.
 *** Info: It's not possible to use the LocalSystem account for services
 *** Info: that can change the user id without an explicit password
 *** Info: (such as passwordless logins [e.g. public key authentication]
 *** Info: via sshd) when having to create the user token from scratch.
 *** Info: For more information on this requirement, see
 *** Info: https://cygwin.com/cygwin-ug-net/ntsec.html#ntsec-nopasswd1
 *** Info: If you want to enable that functionality, it's required to create
 *** Info: a new account with special privileges (unless such an account
 *** Info: already exists). This account is then used to run these special
 *** Info: servers.
 *** Info: Note that creating a new user requires that the current account
 *** Info: have Administrator privileges itself.
 *** Info: No privileged account could be found.
 *** Info: This script plans to use 'cyg_server'.
 *** Info: 'cyg_server' will only be used by registered services.
 *** Query: Do you want to use a different name? (yes/no) no
 *** Query: Create new privileged user account 'ACMEHOST\cyg_server' (Cygwin name: 'cyg_server')? (yes/no) yes
 *** Info: Please enter a password for new user cyg_server. Please be sure
 *** Info: that this password matches the password rules given on your system.
 *** Info: Entering no password will exit the configuration.
 *** Query: Please enter the password: mysecret
 *** Query: Reenter:
 *** Info: User 'cyg_server' has been created with password 'mysecret'.

The important info is this:

 *** Info: It’s not possible to use the LocalSystem account for services
 *** Info: that can change the user id without an explicit password
 *** Info: (such as passwordless logins [e.g. public key authentication]
 *** Info: via sshd) when having to create the user token from scratch.

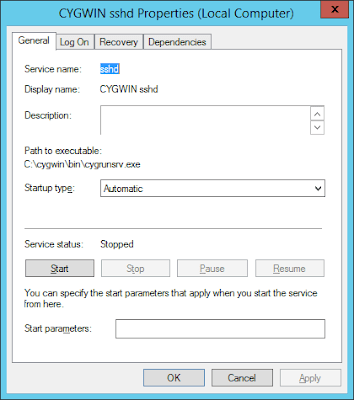
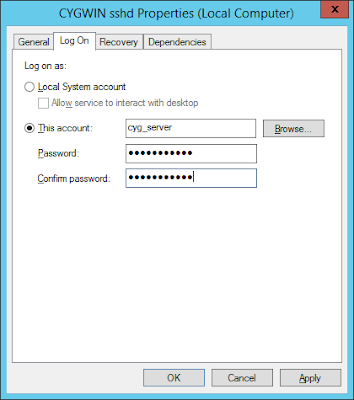
So, the first thing that we need to do is to stop “CYGWIN sshd” service and change logon account for the sshd service as shown on the following screenshots:


At this point you can not start the service yet, if you try you’ll find in /var/log/sshd.log the following error:

 /var/empty must be owned by root and not group or world-writable.

What we need to do is to change owner of the directory /var/empty from SYSTEM to cyg_server. Open cygwin.bat and run:

 // check current permissions
 $ ls -al /var/empty
 total 0
 drwx------+ 1 SYSTEM ACMEHOST+None 0 Mar 6 12:10 .
 drwxr-xr-x+ 1 alesk ACMEHOST+None 0 Mar 6 12:10 ..

 // or with:
 $ getfacl /var/empty
  # file: /var/empty
  # owner: SYSTEM
  # group: ACMEHOST+None
  user::rwx
  group::---
  other:---
  default:user::rwx
  default:group::r-x
  default:other:r-x

 // So I tried to change the owner to cyg_server:
 $ chown cyg_server /var/empty
 invalid user cyg_server

 // What? At first I didn't know why is cyg_server invalid, but then
 // I realized that I added only one (my) account in /etc/passwd, so I
 // need to append cyg_server user as well:
 $ mkpasswd -l -u cyg_server >> /etc/passwd

 // restared cygwin.bat shell and run
 $ chown ACMEHOST+cyg_server /var/empty

 Remember that by default username is prefixed by hostname.
 // if you ever wish to change back to Local System account,
 // all that is needed is to again change Service account
 // under which CYGWIN sshd is running and owner of /var/empty:
 $ chown SYSTEM /var/empty

At this point you should be able to start “CYGWIN sshd” service under local cyg_server account. The last thing you need to do is to test the connection with public key authentication. I used Mobaxterm for that on my workstation ACMEWKS, but you could as easily use Cygwin SSH on your workstation:

In MobaXterm window:

We need to generate some public-private keys. Note that in our case we need PK keys for passwordless authentication, so we didn't password protect rsa private key in the example that follows.


 [alesk.ACMEWKS] ? ssh-keygen -t rsa
 Generating public/private rsa key pair.
 Enter file in which to save the key (/home/mobaxterm/.ssh/id_rsa):
 Enter passphrase (empty for no passphrase):
 Enter same passphrase again:
 Your identification has been saved in /home/mobaxterm/.ssh/id_rsa.
 Your public key has been saved in /home/mobaxterm/.ssh/id_rsa.pub.
 The key fingerprint is:
 9a:da:35:e8:ca:6a:14:e4:f0:8c:10:1c:21:41:fe:81 alesk@ACMEWKS
 The key's randomart image is:
 +---[  2048  ]----+
 |**o              |
 |=.o              |
 |.E .             |
 |. * .            |
 |   o    S        |
 |  .    +         |
 | .    + o        |
 |  .. + . .       |
 | ...+.o          |
 +-----------------+

Remember, that /home/mobxterm/.ssh is volatile, after you close the MobaXterm this directory is gone, so you should copy  public/private keys to some local, permanent directory....

 [alesk.ACMEWKS] ? ls -al /home/mobaxterm/.ssh
 total 5
 drwx------ 1 alesk UsersGrp 0 Mar 5 15:46 .
 drwx------ 1 alesk UsersGrp 0 Mar 5 11:09 ..
 -rw------- 1 alesk UsersGrp 1675 Mar 5 15:46 id_rsa
 -rw-r--r-- 1 alesk UsersGrp 396 Mar 5 15:46 id_rsa.pub
 -rw-r--r-- 1 alesk UsersGrp 171 Mar 5 09:11 known_hosts
 [alesk.ACMEWKS] ? mkdir /cygdrive/g/ssh
 [alesk.ACMEWKS] ? cp /home/mobaxterm/.ssh/id_rsa* /cygdrive/g/ssh

 // copy public key to remote host
 [alesk.ACMEWKS] ? scp /cygdrive/g/ssh/id_rsa.pub alesk@ACMEHOST:~/.ssh

 // append previoulsy copied public key to authorized_keys on remote host
 $ ssh alesk@ACMEHOST 'cat ~/.ssh/id_rsa.pub >> ~/.ssh/authorized_keys'


Now, we can try to connect from ACKMEWKS to ACMEHOST with PK authentication:

 [alesk.ACMEWKS] ssh -i /cygdrive/g/ssh/id_rsa alesk@ACMEHOST

You should be logged on ACMEHOST without prompt for a password. Properly protect private key. Better yet, you should limit what someone can execute execute via passwordless ssh connection with the help of prefix in authorized_keys file for each public key (see this for an example).

And finally, you can troubleshoot ssh connection by turning on verbose mode (-v, -vvv), for example:

 [alesk.ACMEWKS] ssh -vvv -i /cygdrive/g/ssh/id_rsa alesk@ACMEHOST


Installing OpenSSH (Cygwin 1.7.35) on Windows 2012 R2

From: dbaportal.eu
(Thanks to alesk for his great job)


Whenever I need some Cygwin functionality on my Windows hosts, I always prefer pre-packaged solutions (Mobaxterm for ssh client on Windows, CopSSH for SSHD, etc.). This time around I needed a free SSH server for Windows 2012R2 host without the limits imposed by recent CopSSH free version. I decided that I’ll try to use SSHD from cygwin.com directly, something that I tried to avoid in the last decade.

1) INSTALLATION

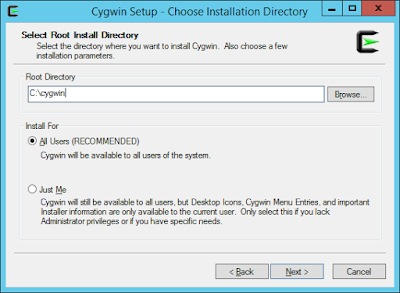
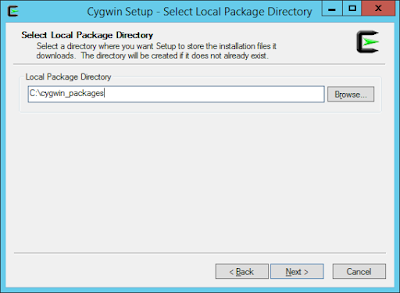
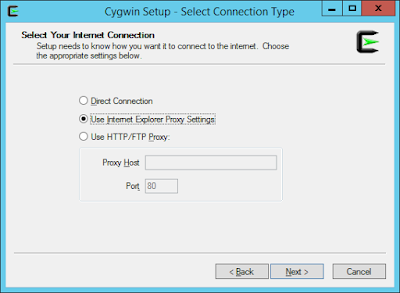
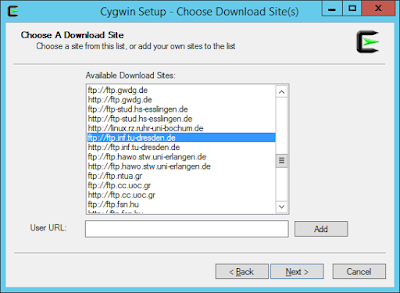
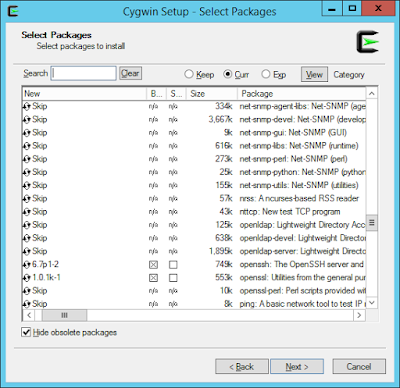
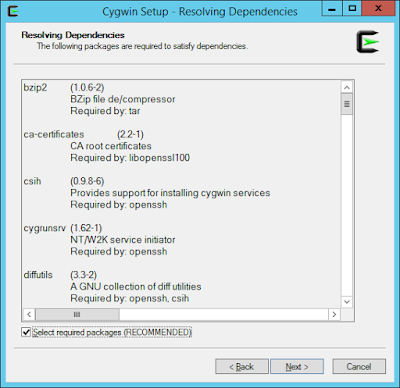
First you’ll need to download installer from cygwin.com, save the file in some temporary directory. I downloaded 64-bit version because I’ll be installing 64-bit packages. More precisely, I selected the following packages and their dependencies: nano, zip, unzip, OpenSSH, openssl and rlwrap.

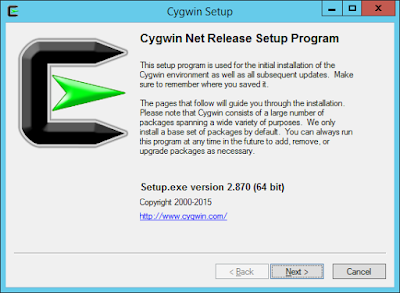
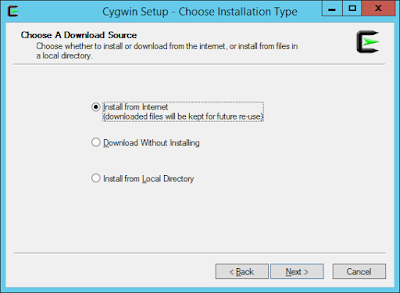
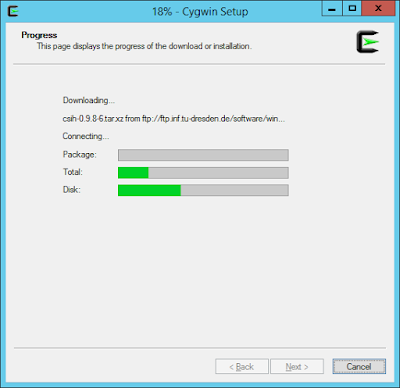
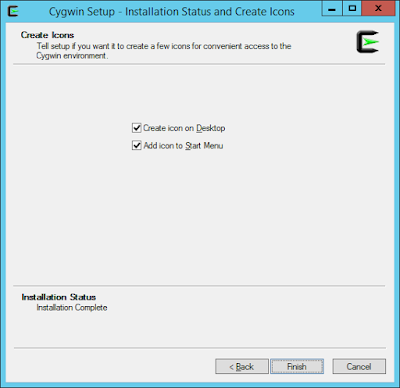
Run the installer and follow the wizard, here are screenshots from my host:


2) CONFIGURATION

2.1) Should we edit cygwin.bat?

You’ll probably find numerous recommendation on the net (and even in Oracle documentation — “Enterprise Manager Cloud Control Basic Installation Guide”) that first thing you should do is to open cygwin.bat and insert line set CYGWIN=binmode ntsec, so that bat would look like:

notepad c:\cygwin\cygwin.bat

@echo off

C:ssh
chdir C:\cygwin\bin
set CYGWIN=binmode ntsec << INSERTED LINE
bash --login -i

2.2) Test installation

Open C:\cygwin\cygwin.bat and run:

$ cygrunsrv -h

And you should see help for cygwrunsrv, otherwise something went wrong and you’ll likely have to re-install.

2.3 Configure SSHD service by opening cygwin.bat with “Run as Administrator” privilege:

$ ssh-host-config

*** Info: Generating missing SSH host keys
ssh-keygen: generating new host keys: RSA1 RSA DSA ECDSA ED25519
*** Info: Creating default /etc/ssh_config file
*** Info: Creating default /etc/sshd_config file

*** Info: StrictModes is set to 'yes' by default.
*** Info: This is the recommended setting, but it requires that the POSIX
*** Info: permissions of the user's home directory, the user's .ssh
*** Info: directory, and the user's ssh key files are tight so that
*** Info: only the user has write permissions.
*** Info: On the other hand, StrictModes don't work well with default
*** Info: Windows permissions of a home directory mounted with the
*** Info: 'noacl' option, and they don't work at all if the home
*** Info: directory is on a FAT or FAT32 partition.
*** Query: Should StrictModes be used? (yes/no) yes

*** Info: Privilege separation is set to 'sandbox' by default since
*** Info: OpenSSH 6.1. This is unsupported by Cygwin and has to be set
*** Info: to 'yes' or 'no'.
*** Info: However, using privilege separation requires a non-privileged account
*** Info: called 'sshd'.
*** Info: For more info on privilege separation read /usr/share/doc/openssh/README.privsep.
*** Query: Should privilege separation be used? (yes/no) yes

*** Info: Note that creating a new user requires that the current account have
*** Info: Administrator privileges. Should this script attempt to create a
*** Query: new local account 'sshd'? (yes/no) yes

*** Info: Updating /etc/sshd_config file
*** Query: Do you want to install sshd as a service?
*** Query: (Say "no" if it is already installed as a service) (yes/no) yes
*** Query: Enter the value of CYGWIN for the daemon: [] binmode ntsec

*** Info: On Windows Server 2003, Windows Vista, and above, the
*** Info: SYSTEM account cannot setuid to other users -- a capability
*** Info: sshd requires. You need to have or to create a privileged
*** Info: account. This script will help you do so.
*** Info: It's not possible to use the LocalSystem account for services
*** Info: that can change the user id without an explicit password
*** Info: (such as passwordless logins [e.g. public key authentication]
*** Info: via sshd) when having to create the user token from scratch.
*** Info: For more information on this requirement, see
*** Info: https://cygwin.com/cygwin-ug-net/ntsec.html#ntsec-nopasswd1
*** Info: If you want to enable that functionality, it's required to create
*** Info: a new account with special privileges (unless such an account
*** Info: already exists). This account is then used to run these special
*** Info: servers.
*** Info: Note that creating a new user requires that the current account
*** Info: have Administrator privileges itself.
*** Info: No privileged account could be found.
*** Info: This script plans to use 'cyg_server'.
*** Info: 'cyg_server' will only be used by registered services.
*** Query: Do you want to use a different name? (yes/no) no
*** Query: Create new privileged user account 'ACMEHOST\cyg_server' (Cygwin name: 'cyg_server')? (yes/no) yes

*** Info: Please enter a password for new user cyg_server. Please be sure
*** Info: that this password matches the password rules given on your system.
*** Info: Entering no password will exit the configuration.
*** Query: Please enter the password: mysecret
*** Query: Reenter:

*** Info: User 'cyg_server' has been created with password 'mysecret'.
*** Info: If you change the password, please remember also to change the
*** Info: password for the installed services which use (or will soon use)
*** Info: the 'cyg_server' account.

*** Warning: Expected privileged user 'cyg_server' does not exist.
*** Warning: Defaulting to 'SYSTEM'

*** Info: The sshd service has been installed under the LocalSystem
*** Info: account (also known as SYSTEM). To start the service now, call
*** Info: `net start sshd' or `cygrunsrv -S sshd'. Otherwise, it
*** Info: will start automatically after the next reboot.

*** Info: Host configuration finished. Have fun!

Note the line 33:

*** Query: Enter the value of CYGWIN for the daemon: [] binmode ntsec

Here you should enter any env. variables for cygwin daemon if any. I did NOT set those two variables, they’re here only as a note point. According to cygwin documentation, both parameters are obsolete since Cygwin 1.7, I believe the only reason both parameter are still listed, even in Oracle current documentation, is that someone found some old “how-to” on the net (which was valid before 1.7 release) and took it as granted.

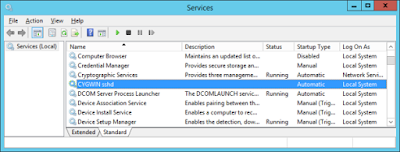
After configuration you should check services, you should see CYGWIN sshd….


and two new local accounts, cyg_server and sshd…


2.4) Enable existing local user account to connect to SSH daemon

// take a backup if by any chance you already have a passwd file (not the case for fresh installation!)
copy C:\cygwin\etc\passwd C:\cygwin\etc\passwd.bak

Open cygwin.bat:

$ /bin/mkpasswd -l -u alesk >> /etc/passwd

The above command will write something like this in the passwd file:

ACMEHOST+alesk:*:197610:197121:U-ACMEHOST\alesk,S-1-5-21-1611771360-925472152-3555864332-1002:/home/alesk:/bin/bash

It means that you can connect to ACMEHOST from some remote workstation with:

$ ssh ACMEHOST+alesk@ACMEHOST

Not cool. I prefer using, simple:

$ ssh alesk@acmehost

so, I changed the username in /etc/passwd to:

alesk:*:197610:197121:U-ACMEHOST\alesk,S-1-5-21-1611771360-925472152-3555864332-1002:/home/alesk:/bin/bash

And for a domain account you would execute:

$ /bin/mkpasswd -d -u alesk >> /etc/passwd
$ mkdir -p /home/alesk
$ chown alesk /home/alesk

2.5) Edit ssh config file

notepad C:\cygwin\etc\sshd_config

or within cygwin.bat:

nano /etc/sshd_config

At the end of file add:

KexAlgorithms diffie-hellman-group-exchange-sha1,diffie-hellman-group1-sha1

I’m not sure what is the true reasoning for that, but probably for hardening the sshd security!?

2.6) Start SSH daemon

Cygwin.bat

/usr/bin/sshd

or

$ cyrunsrv -S sshd

or start Windows service

Open cmd.exe with “Run as admninistrator”:

cmd> net stop "CYGWIN sshd"
cmd> net start "CYGWIN sshd"

If service doesn’t start check the log at C:\cygwin\var\log\sshd.log.

If you need to add some package afterwards, simply re-run setup.exe installer and check additional packages that you want to install.